
A dental air compressor is an essential part of many dental clinics. It provides compressed air for dental units, air-driven handpieces and other pneumatic equipment. Because the quality and stability of the compressed air can directly affect the performance of connected equipment, proper installation, operation and maintenance are important for every dental practice.
A compressor that is poorly ventilated, incorrectly operated or not drained regularly may develop problems such as overheating, water accumulation, pressure loss, abnormal vibration and frequent motor shutdowns.
So, how should you use and maintain a dental air compressor? And what should you do when the compressor suddenly stops working or cannot reach the normal pressure?
This guide covers the essential dental air compressor operating requirements, maintenance procedures, common problems and troubleshooting methods, followed by an overview of the Lingchen AC1100 dental air compressor.
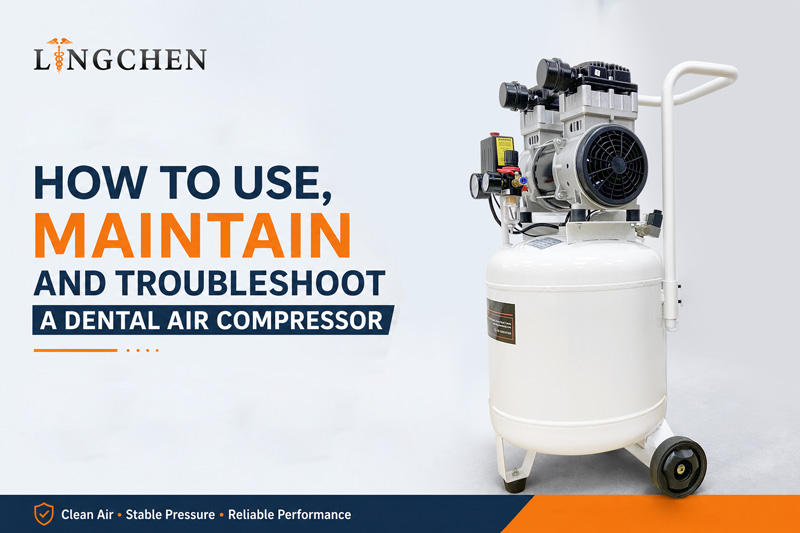
1. How to Use a Dental Air Compressor Safely
Correct installation is the first step toward reliable compressor operation. Before starting a new dental air compressor, carefully read the manufacturer’s instruction manual and make sure the installation environment meets the requirements.
Choose a Dry, Clean and Well-Ventilated Location
A dental air compressor should be installed in a dry, clean and well-ventilated area.
Avoid placing the compressor:
- Outdoors or where it can be exposed to rain
- Near water or areas with excessive humidity
- In flammable or explosive environments
- In areas with excessive dust
- In poorly ventilated rooms
- Near corrosive substances or materials
Good ventilation is particularly important because the compressor motor and compressor head generate heat during operation.
For applications requiring frequent or continuous operation, additional airflow, such as a cooling fan, may be needed to help dissipate heat from the compressor head.
Keep Sufficient Clearance Around the Compressor
The compressor should be positioned vertically on a hard, level and stable surface.
Keep at least 50 cm of clearance from walls or other objects.
This space provides better ventilation and makes it easier to inspect and maintain the compressor.
An uneven floor or unstable installation can also increase vibration and noise during operation.
Check the Electrical Supply
Before connecting the compressor to the power supply, check that the electrical system meets the required specifications.
The operating requirements should include:
- Correct voltage and frequency
- Reliable grounding
- Appropriate power cable
- Suitable fuse or circuit protection
The power supply should not be below 200V AC and should remain within the equipment’s specified voltage range.
The recommended power cable cross-sectional area should be at least 1.5 mm², with a cable length of no more than approximately 30 meters.
Reliable grounding is also important for safe operation.
Start and Stop the Compressor Correctly
Before connecting the power supply, make sure the compressor is switched off.
Always use the compressor’s power or pressure switch to start and stop the machine.
Do not repeatedly pull out the power plug to shut down the compressor.
If the compressor needs to be moved, turn it off first and completely release the compressed air inside the tank.
Do Not Touch Hot Components
During operation, several components can reach high temperatures.
These may include:
- Compressor head
- Exhaust pipe
- Check valve
- Other components near the compressed-air outlet
Do not touch these components while the compressor is running or immediately after shutdown. Allow sufficient cooling time before inspection or maintenance.
2. Important Operating Precautions
A dental air compressor is designed to supply compressed air to pneumatic equipment. It should only be used for its intended purpose.
Compressed air should never be deliberately discharged directly toward people or animals.
The compressor should also be protected from impact or unexpected movement during operation. Do not strike, push or move the machine while it is running.
For continuous operation, ensure that sufficient cooling airflow is available around the compressor.
These simple precautions can significantly reduce the risk of overheating, mechanical damage and unexpected shutdowns.
3. Daily Maintenance of a Dental Air Compressor
Regular maintenance does not need to be complicated. In many cases, a few minutes of daily inspection can prevent much larger problems later.
The most important daily maintenance task is draining accumulated water from the air tank.
Why Does Water Accumulate Inside the Air Tank?
Compressed air naturally contains moisture. When the air is compressed and subsequently cools inside the tank, part of the moisture condenses into water.
If this water is not removed regularly, it can contribute to:
- Internal tank corrosion
- Moisture entering the air lines
- Poor compressed-air quality
- Reduced equipment performance
- Damage to downstream pneumatic equipment
For this reason, the tank should be drained at least once a day.
Before draining the tank, reduce the tank pressure to below 0.1 MPa.
Keep the Compressor Clean
Dust and dirt should not be allowed to accumulate around the compressor.
Regularly clean:
- The compressor housing
- Ventilation openings
- Air intake areas
- The surrounding floor and space
A clean installation helps maintain proper airflow and makes it easier to identify oil-free compressor leaks, abnormal vibration or other problems.
Listen for Abnormal Sounds
During normal operation, pay attention to changes in:
- Motor sound
- Vibration
- Starting behavior
- Filling time
- Pressure build-up
If the compressor suddenly becomes louder, vibrates excessively or takes significantly longer to reach normal pressure, investigate the cause rather than continuing to operate it without inspection.
4. Regular Dental Air Compressor Maintenance
In addition to daily inspection, several components require periodic maintenance.
The following schedule provides a practical reference:
| Maintenance Interval | Recommended Action |
|---|---|
| Every Day | Drain water from the air tank |
| Every Day | Check for abnormal noise, vibration or air leakage |
| Regularly | Inspect the safety valve |
| Regularly | Check air hoses, connectors and drainage valve |
| Every 500 Operating Hours | Replace the silencer filter element |
| Every Year | Inspect the air tank and perform the required pressure-resistance test |
| Before Moving | Completely release compressed air from the tank |
| Before Maintenance | Disconnect power and completely release tank pressure |
Check the Safety Valve
The safety valve is an important pressure-protection component.
According to the provided operating requirements, when the tank pressure is approximately 0.5–0.8 MPa, the safety valve can be checked by gently pulling the valve ring backward.
The valve should release air smoothly and return to its normal position when the valve stem is pressed.
If the safety valve does not operate correctly, stop using the compressor and arrange for qualified inspection.
Replace the Silencer Filter
The silencer filter element should be replaced after approximately 500 operating hours, according to the specified maintenance requirements.
A blocked or heavily contaminated filter can affect airflow and increase the workload of the compressor.
If the compressor operates in a particularly dusty environment, the filter may need to be inspected more frequently.
Inspect the Air Tank
The air tank is a pressure vessel and requires particular attention.
The tank should be inspected regularly for:
- Serious corrosion
- Dents or impact damage
- Abnormal deformation
- Pressure-test failure
A tank with serious corrosion, severe impact damage or a failed pressure-resistance test should be removed from service and replaced according to applicable safety requirements.
5. Important Safety Rule Before Maintenance
Before performing any maintenance, always follow two steps:
1. Disconnect the electrical power.
2. Completely release the compressed air inside the tank.
Never perform maintenance on a pressurized air tank.
Components such as the compressor head, exhaust pipe and check valve may also remain hot after shutdown, so allow sufficient cooling time before servicing.
Electrical components and pressure vessels should be inspected or serviced by qualified personnel.
6. Common Dental Air Compressor Problems and Solutions
Even when a compressor is properly maintained, problems can occasionally occur.
The best troubleshooting approach is to identify the symptom first and then check the most likely causes.
| Problem | Possible Cause | Recommended Solution |
|---|---|---|
| Compressor does not start | No power, blown fuse, switch off, overload protection activated | Check power, fuse and switch; allow the motor to cool if thermal protection has activated |
| Motor hums but does not start | Low voltage, motor fault, check valve or pressure switch problem | Check voltage; professional inspection may be required |
| Fuse blows or circuit breaker trips repeatedly | Incorrect fuse, excessive electrical load, component fault | Use the correct protection device and inspect the electrical circuit |
| Thermal protection repeatedly activates | Low voltage, poor ventilation, high ambient temperature | Check voltage and improve ventilation |
| Pressure drops after shutdown | Air leakage, open drain valve, check valve leakage | Check air connections, drain valve and check valve |
| Compressed air contains excessive water | Water accumulation, high temperature or humidity | Drain the tank and improve moisture control |
| Compressor runs continuously | Air leakage, pressure switch problem, check valve contamination | Check the air system and pressure-control components |
| Excessive vibration | Loose bolts, uneven floor, damaged rubber feet | Tighten bolts, level the compressor and replace damaged feet |
| Output pressure is too low | Open drain valve, blocked filter, leakage, damaged gasket or worn piston/cylinder | Inspect the air circuit, filter and mechanical components |
7. Quick Dental Air Compressor Troubleshooting Guide
If you need to diagnose a problem quickly, start with the symptom rather than immediately replacing components.
| If You Notice… | Check These First |
|---|---|
| Compressor will not start | Power → Fuse → Switch → Overload protection |
| Motor hums but will not run | Voltage → Motor → Check valve → Pressure switch |
| Compressor overheats | Ventilation → Ambient temperature → Voltage → Workload |
| Pressure drops after shutdown | Air leakage → Drain valve → Check valve |
| Too much water in compressed air | Tank drainage → Humidity → Air treatment |
| Compressor never stops | Air leakage → Pressure switch → Check valve |
| Compressor vibrates excessively | Floor → Bolts → Rubber feet |
| Output pressure is low | Drain valve → Filter → Air leakage → Valve/gasket → Piston/cylinder |
This quick-check method can help identify simple problems before contacting a service center.
However, electrical faults, pressure-vessel problems and major mechanical failures should be handled by qualified technicians.
8. Why Is My Dental Air Compressor Not Starting?
A compressor that does not start does not necessarily mean the motor has failed.
Start with the simplest checks.
Step 1: Check the Power Supply
Make sure the compressor is receiving power and that the plug, electrical connection and circuit protection are functioning correctly.
Step 2: Check the Fuse
A blown fuse can prevent the compressor from starting.
Always use the correct fuse specification. Do not replace a fuse with an unsuitable higher-rated fuse.
Step 3: Check the Power Switch
Make sure the compressor switch is in the correct operating position.
Step 4: Check Thermal Overload Protection
If the compressor has been operating under high load or in a poorly ventilated environment, thermal protection may activate.
Allow the motor to cool. Under the specified operating conditions, the compressor may restart after approximately 15 minutes.
If the compressor repeatedly stops or cannot restart after cooling, professional inspection is recommended.
9. Why Is My Dental Air Compressor Overheating?
Overheating is commonly associated with poor ventilation, high ambient temperature, low voltage or excessive workload.
First check whether the compressor has enough space around it.
The compressor should have at least 50 cm of clearance from walls or surrounding objects.
Also check:
- Whether ventilation openings are blocked
- Whether the room temperature is too high
- Whether the power voltage is too low
- Whether the compressor is being used continuously beyond its intended workload
- Whether additional cooling airflow is required
For continuous operation, installing a cooling fan can help improve airflow around the compressor head.
Do not continue operating a compressor that repeatedly overheats without identifying the cause.
10. Why Does a Dental Air Compressor Lose Pressure?
If tank pressure decreases after shutdown, the first thing to check is whether compressed air is escaping from the system.
Inspect:
- Air hoses
- Connectors
- Drain valve
- Check valve
- Pressure-control components
Loose connections should be tightened.
If necessary, an appropriate sealing component can be used.
If the drain valve is open, close it completely.
A leaking check valve may require cleaning or replacement.
If the pressure drops while the compressor is running, also inspect the filter, valve group, gaskets, piston and cylinder for possible causes of insufficient air output.
11. How to Prevent Dental Air Compressor Failures
Preventive maintenance is generally more effective than waiting for a compressor to fail.
Keep the Installation Area Ventilated
Heat is one of the main factors that can affect compressor performance.
Make sure the compressor has enough surrounding space and that ventilation openings remain unobstructed.
Drain the Tank Regularly
Daily drainage helps control moisture and reduces the risk of internal corrosion.
Check for Air Leakage
A small air leak may seem unimportant, but continuous leakage forces the compressor to run more frequently.
Check hoses, connectors, valves and the dental equipment connected to the compressor.
Pay Attention to Abnormal Vibration
Unusual vibration can indicate loose bolts, an uneven floor or damaged rubber feet.
Correcting these problems early can prevent further mechanical wear.
Replace Filters on Schedule
A dirty or blocked filter can restrict airflow and increase compressor workload.
Follow the manufacturer’s recommended maintenance interval.
12. Lingchen AC1100 Dental Air Compressor
For dental clinics and dental equipment projects, the compressor should provide sufficient airflow, stable pressure and reliable operation while remaining easy to maintain.
The Lingchen AC1100 is an oil-free dental air compressor designed to supply compressed air for dental units, pneumatic dental equipment and other applications requiring a clean compressed-air source.
AC1100 Main Specifications
| Specification | Lingchen AC1100 |
|---|---|
| Compressor Type | Oil-Free Dental Air Compressor |
| Motor Power | 1100W |
| Tank Capacity | 50L |
| Rated Voltage | 220V |
| Frequency | 50Hz |
| Maximum Pressure | 8 bar |
| Air Flow | 256 L/min at 0 bar |
| Rated Speed | 1400 rpm |
| Tank Filling Time | Approx. 2.8 minutes |
| Operating Current | Approx. 4.7–5.2A |
The AC1100 is designed with a focus on fast filling, electrical safety and stable operation.
13. What Are the Main Features of the AC1100?
Fast-Type Motor
One of the main upgrades of the AC1100 is its fast-type motor.
The tank filling time is approximately 2.8 minutes, compared with approximately 3.8 minutes for the previous motor design.
This means the compressor can build up pressure faster and reduce waiting time during operation.
Two Safety Protection Systems
The AC1100 incorporates two types of protection:
- Motor thermal protection
- Electrical safety protection
Thermal protection helps protect the motor when operating temperature becomes excessive, while electrical protection provides an additional layer of protection against electrical overload conditions.
Stable Operating Current
The AC1100 operates at approximately 4.7–5.2A, supporting more stable electrical operation.
This is particularly useful for dental clinics where the compressor may share the electrical environment with other dental equipment.
Oil-Free Design
The AC1100 uses an oil-free compressor design.
Oil-free compressors are commonly selected for dental applications because compressed air quality is an important consideration when supplying dental units and pneumatic instruments.
Rust-Resistant Tank Design
The internal tank surface is designed with a rust-resistant coating to help reduce corrosion and support longer-term operation.
However, regular drainage is still essential because moisture naturally accumulates inside compressed-air tanks.
50L Air Tank
The 50L tank provides a compressed-air reserve for dental equipment and helps reduce unnecessary compressor cycling during periods of fluctuating air demand.
14. How to Choose a Dental Air Compressor
Choosing a dental compressor should involve more than simply comparing motor power or tank size.
Before purchasing, consider the following factors.
| Feature | What to Consider |
|---|---|
| Airflow | Make sure the compressor can meet the air demand of connected dental equipment |
| Tank Capacity | A larger tank provides more compressed-air reserve |
| Maximum Pressure | Pressure should meet the requirements of the dental unit and connected equipment |
| Air Quality | Oil-free operation is commonly preferred for dental applications |
| Safety Protection | Thermal and electrical protection can improve operating safety |
| Moisture Control | Regular tank drainage or additional air treatment may be necessary |
| Noise & Vibration | Important for the working environment of a dental clinic |
| Maintenance | Filters, valves, drainage and service components should be accessible |
| After-Sales Support | Spare parts and technical support are important for long-term B2B use |
For a dental clinic, selecting a compressor based only on price can lead to higher maintenance costs later.
Airflow, pressure, tank capacity, operating environment and the number of connected dental units should all be considered together.
15. Dental Air Compressor Maintenance Checklist
Use the following checklist as a simple reference for daily and periodic maintenance.
Before Operation
- Read the instruction manual.
- Check the electrical supply.
- Confirm reliable grounding.
- Make sure the compressor is installed on a stable surface.
- Check ventilation and surrounding clearance.
- Inspect air hoses and connections.
Every Day
- Drain water from the air tank.
- Check for unusual noise.
- Check for excessive vibration.
- Check for air leakage.
- Keep the compressor clean.
Every 500 Operating Hours
- Inspect and replace the silencer filter element according to the maintenance requirements.
Every Year
- Inspect the air tank.
- Check safety components.
- Perform the required pressure-resistance inspection according to applicable regulations.
Before Maintenance or Moving
- Turn off the compressor.
- Disconnect the electrical power.
- Completely release compressed air from the tank.
- Allow hot components to cool.
16. Frequently Asked Questions About Dental Air Compressors(FAQs)
1. How often should I drain a dental air compressor?
The air tank should be drained at least once a day under the maintenance requirements described in this guide. In high-humidity environments, more frequent drainage may be appropriate.
2. Why does my dental compressor keep overheating?
Common causes include poor ventilation, high ambient temperature, low voltage and excessive workload. Check the installation environment and make sure the compressor has sufficient airflow.
3. Why does my dental compressor keep running?
Possible causes include air leakage, a faulty pressure switch or a problem with the check valve. Inspect the compressed-air system before replacing components.
4. Why does my dental compressor lose pressure after shutdown?
Check for air leakage, an open drain valve or a leaking check valve. Loose hose connections and damaged seals can also cause pressure loss.
5. Why is there water in my compressed air?
Moisture naturally condenses when compressed air cools inside the tank. Regular tank drainage is necessary. If additional moisture control is required, an appropriate air dryer or water separator can be considered.
6. How often should I replace the dental compressor filter?
For the maintenance requirements covered in this guide, the silencer filter should be replaced after approximately 500 operating hours.
7. Is an oil-free compressor suitable for a dental clinic?
Yes. Oil-free compressors are commonly used in dental applications because they avoid oil lubrication inside the compression chamber and are suitable for supplying compressed air to dental equipment when properly maintained.
8. Can I move the compressor while there is still pressure in the tank?
No. Turn off the compressor and completely release the compressed air before moving it.
9. What should I do if the compressor suddenly stops?
Check the power supply, fuse, switch and overload protection first. If thermal protection has activated, allow the motor to cool before restarting. If the problem continues, contact a qualified service center.
10. How can I extend the service life of a dental air compressor?
Regular tank drainage, proper ventilation, filter replacement, air-leak inspection and correct operating procedures are among the most effective ways to reduce unnecessary wear and extend compressor service life.
Conclusion
A dental air compressor plays an important role in maintaining a reliable compressed-air supply for dental equipment. Proper installation, correct operation and regular maintenance can help prevent common problems such as overheating, moisture accumulation, pressure loss, excessive vibration and unexpected shutdowns.
The most important habits are simple: keep the compressor clean, maintain good ventilation, drain the air tank regularly, check for leaks, inspect safety components and replace filters according to the recommended schedule.
When troubleshooting a problem, always identify the symptom first and check the simplest possible causes before replacing components.
For dental clinics, distributors and dental equipment projects, the Lingchen AC1100 oil-free dental air compressor combines a 1100W motor, 50L tank, 8-bar maximum pressure, 256 L/min airflow, fast 2.8-minute filling time and dual safety protection, making it a practical option for dental compressed-air applications.
Proper maintenance is not only about fixing a compressor when it fails. It is about creating a preventive maintenance routine that keeps the compressor operating safely and reliably every day.
Post time: Aug-28-2026